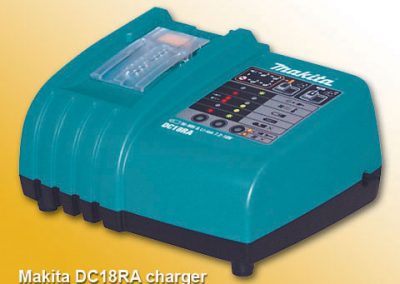
Makita DC18RA charger conversion to 220VAC

DC18RA T conversion
How to convert Makita charger to 220VAC
This guide relates ONLY to Makita model DC18RA T P/N: 630516A7
Please don’t ask about other models as no answer will be given, sorry.
How did I make a US / American Makita charger to work in European countries ?
How did I mod (modify) Makita DC18RA T charger from 110VAC to 220-240VAC ?
DISCLAIMER – Important!
![]() Please note:
Please note:
1. ![]() There are few PCB models for the same DC18RA charger.
There are few PCB models for the same DC18RA charger.
This page relates ONLY to the PCB model shown in the following images which is of Makita DC18RA T , P/N: 630516A7
2. ![]() I have received several comments that described same model # but with different design and components.
I have received several comments that described same model # but with different design and components.
Please beware that this mod might not work on your charger or worst, will damage it.
Only perform this mod if you know your way around with electronics !
3. ![]() I got a genuine 220V DC18RA-T charger P/N:630508-6 to compare
I got a genuine 220V DC18RA-T charger P/N:630508-6 to compare
(see image) This charger has more changes from my mod.
Due to this, please consider if you are willing to take the chance.
– Makita Li-ion batteries type BL1815, BL1430/A, BL1830
– Makita various Ni-MH batteries (see charger manual)
1. Electrolytic capacitor 470µF 400V with Max. diameter of 30mm. Lower µF value will probably be OK too, you’ll find it with smaller diameter and cheaper. I got a report from Sweden saying this mod works OK with 150µF 400V.
![]() Note: Take extra care to capacitor polarity when you place it.
Note: Take extra care to capacitor polarity when you place it.
2. Varistor 14D361K , VMax=360 Imax=6000
![]() Note:
Note:
– original varistor is covered with a black shrink, remove it first.
– after replacement, it is advised to add the shrink to avoid damage in case of blow
3. Electrolytic capacitor 22µF 450V (or 400V) with Max. diameter of 13mm
![]() Note: Take extra care to capacitor polarity when you place it.
Note: Take extra care to capacitor polarity when you place it.
4. (*) MOSFET 2SK3679 (with 900V Vds)
This component is located near the varistor and is attached to the heat-sink. This was reported in a Norwegian forum which says the MOSFET also needs to be replaced to have 900Vds. Users reported that 220V Makita charger uses MOSFET 2SK3679 while 110V version uses either 2SK3528 or 2SK3683. It was also reported this part is costly and that in cases of moded chargers that didn’t replace this part, all works OK, (including mine with 2SK3683). So, my advise for you is to check your charger MOSFET and decide if you want to go safe and replace it as well, or take the risk ![]() .
.
![]() Note:
Note:
– If you can’t find 2SK3679, its direct replacement is: STF9NK90Z
– This MOSFET needs a thermal compound when attaching it to the heatsink. It is advised to replace old compound with fresh one when you replace it.
5. Ceramic Fuse 6.3A 250V In case you blew the unit ![]() you’ll probably need to replace this fuse as well.
you’ll probably need to replace this fuse as well.
6. Mains Plug For safer and secure operation, cut the US plug and add a mains plug according to the standard used in your country. The US supplied wire comes without earth wire so you don’t need to worry of it.
Have fun and enjoy your Makita tools, Avi
For more How-To guides by Avi, Visit the main DIY page
You might find there useful guides such as :
Fixing Grohe flush system
12V Burnt LED bulb fix
How to repair LG refrigerator water leakage?
and more…
Comments, remarks and updates are welcome.
Some will be published, with hidden sender's details.
Did you find this article helpful?
Did it save you time and trouble?
If yes, please consider donating some $$$ to help me cover the hosting cost involved. Thanks
To make a donation, please click the following PayPal button:
Copyright © Schneor Design. All rights reserved. Do not copy without written consent from the author.


Hi, great tutorial!
After the conversion this charger will be able to work also in 110V or only 220V?
Thanks
220V ONLY!
Conversion means one way change.
You will not be able to use it on 110V
Interesting. Fond this when if need to repair a charger. Did you glue the new components to the board? What type of glue?
Thanks for your question.
NO glue, all replaced components are through-hole and soldering was used with regular solder wire and flux.
Good luck
Hi, I have a DC18RA S and the circuit board is completely different,do you have any idea what I need to do to switch it to 220v?
I’m sorry but no, I have no idea of it.
Please be warned that this post relates ONLY to model DC18RA-T, P/N: 630516A7
Good luck